What's new
What's new

A Scraping Newbie Has The First Of Many Questions

There's something about the shape of the blue spots that looks wrong to me. They are long, and the gaps between them are long. JST -- is that what you meant by "streaks"? This is how my prints look when I'm done roughing. I'm guessing that your strokes are too long. Or maybe you're making short strokes but connecting too many of them together. When you're finishing you really want distinct separated strokes. You don't have to scrape off all the blue every time, you can split the spots into smaller ones instead. What's the range on your stroke adjustment?

The other thing is that these three prints are significantly different:
- The first is heavy on the edges, especially the lower left and upper right.
- The second is light on the lower left, pretty even otherwise.
- The third is heavy on the edges again, a little light in the middle.
How many cycles were between these passes? In general are you getting consistent results spotting? If not you need to work that out before moving forward, you could have something thermal going on, or maybe a convexity.
See my response to JST above. I have indeed been having a hard time with spotting consistency. My scraper has stroke lengths of 3 to 23mm at roughly 3mm increments. I've been scraping at 5 to 8mm mostly. Streaking has been an issue. I reviewed some scraping videos and noticed that the guys in them are easily sliding the casting around during the spotting process. That is not how it is working for me and that is why I suspect that I have the wrong ink. If I have it thin enough to slide easily, there is almost zero color transfer. If it is thick enough for color transfer it becomes hard to slide around, like it sucks down to the plate.
 
There's something about the shape of the blue spots that looks wrong to me. They are long, and the gaps between them are long. JST -- is that what you meant by "streaks"? This is how my prints look when I'm done roughing. I'm guessing that your strokes are too long. Or maybe you're making short strokes but connecting too many of them together. When you're finishing you really want distinct separated strokes. You don't have to scrape off all the blue every time, you can split the spots into smaller ones instead. What's the range on your stroke adjustment?

The other thing is that these three prints are significantly different:
- The first is heavy on the edges, especially the lower left and upper right.
- The second is light on the lower left, pretty even otherwise.
- The third is heavy on the edges again, a little light in the middle.
How many cycles were between these passes? In general are you getting consistent results spotting? If not you need to work that out before moving forward, you could have something thermal going on, or maybe a convexity.
What I am seeing is a strong tendency for there to be "lines" going from bottom to top (or top to bottom) in the pics. I called them "streaks", but they are heavy and deep blue, plus narrow compared to the spots, so they do not look like "smears".

It seems that there are normal looking spots, and the lines are "added to them" somehow. I do not know what they are from the pics.

If the scrape direction was not changed, or the scraper blade has nicks, there is "chatter", etc, that might happen, I suppose. Or maybe if the surface was not stoned and cleaned off well enough.

I was wondering if it was somehow due to the ink, or the thickness of the coating, etc. I've not seen that before.

I am specially curious since I have been looking for a new ink, not really wanting to go back to the "HiSpot" due to the "Smurf effect". The Charbonnel was mentioned, and here is a person actually using it, so......
 
I am hoping for some help from some folks who have more scraping experience than I do.

I recently decided to teach myself how to scrape in order to restore a Hardinge HLV-H that I bought. After watching a few videos online, it seemed like such a simple thing to do. Instead, it has turned into a project with rabbit holes and sub rabbit holes! And due to a personality trait (flaw?) that I have I am actually enjoying myself. What follows is a summary of what I have done so far.

I bought a hand scraper ($140.00 without blade!!!!!), the Connelly book and the Richard King video from Dapra.

I needed a straightedge but am cheap by nature so I decided to buy a casting from Martin Model that I would machine and scrape myself. Had no clue how to scrape yet, so I also bought an angle plate to practice on. Both castings were nice and machined very easily with no hard spots.

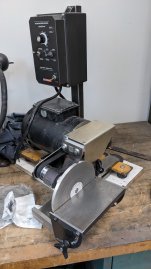
After trying the hand scraper, I quickly realized that there was no way I was going to scrape the entire project that way. I don't know how people do that. Or why. Checked the prices on Biax scrapers and found that they are around $5,000!!! So I went down another rabbit hole and designed and built my own. It is based on a right angle drill from Menard's, a short length of linear guideway and an eccentric within an eccentric for an adjustable stroke length. Pic attached.

I read about the need to stress relieve after machining the castings, so I wrapped them in stainless foil and put them in my precision heat treat furnace. Which is a wood stove that we use to heat our workshop. Using an infrared gun thermometer I watched the temp as best I could and it got to a max of 1,300 F and was allowed to cool overnight as the wood was consumed. Both parts were a nice uniform grey color.

I started scraping on the angle plate and found that the uniform grey was a coating that was pretty tough to get through! Got it all off, but due to being a newbie I dug some ugly scratches in the process. Oh well. I then focused on one of the large surfaces to establish flatness and after about twenty cycles I ended up with what is shown in the picture below.

My questions so far are:
What was the terrible grey layer post stress relieving?
Is the blued pattern in the pic ready for flaking or should I scrape more?
Very interesting, and best of luck with this project, M. I think you have a great attitude and will be successful. If you can possibly arrange to take one of Richard's classes, I highly recommend it.
 
My (limited) experience, and what I've seen documented, is that a proper print is gossamer thin and borderline difficult to see without good lighting and a keen eye. That's why I pointed out that your prints looked heavy (or that you were doing some great photography to resolve it so well.) You are also using a contrast layer (a good thing) but that's potentially additive to the layer thickness as well. I suspect that the inks you have are fine, you just need to thin them more and adapt to the really transparent prints they will produce. Using a sharpie to outline your targets to compensate for the faint print while you are working is a commonly used aid.

As far as the scratches that people have been discussing, I suspect that this is due to invisible chips in the carbide edge that need to be lapped out when you sharpen the blade. Even though the blade looks good under basic magnification, these tiny defects to the edge create linear scratches instead of a clean scrape. To be honest, I think that these scratches are mostly cosmetic (and can even look good sometimes), but they can potentially contribute to chatter when doing the next set of scrapes perpendicular, so it may start stacking up errors. Either way, a lap is easy to rig up and use, and will create nice clean scrapes and make the feedback of the tool a bit better.

The stroke length of the scrapes do look a bit longer than your setting would suggest, I wonder if the foam isolator that you are using in that power train is allowing more travel (overshoot) than you expect? Using the rail itself as the moving part is quite clever, but that's a lot of reciprocating mass and it may be throwing the tool around and extending the scrape. Without seeing it in action it's hard to say, but the scrape marks tell the ultimate story, so measure the actual scrape length to make sure you are setting it to what you want.

When you want to circle back to step scraping that second surface and ensuring squareness, open a new thread for it as I think it will be a useful example and 'I have some thoughts' on how you can pull it off with minimal reference tools. Keep your eyes open for a precision square in the meantime though, as that will make it much easier.
 
Having a powered scraper is the first step downhill in my book.
It is a tool for latter years to do fast.
We learn to crawl. Once really good at that we do a support thing and stand. Given time we walk. Given more we run.
Running is powered scarper tool.
OH, I have a baix..... Does this make one good or a true fool? These are brutal machines and I would guess so many used wrong.
 
Sorry for being late to the party: You can ask my many students who learned how to properly use the BIAX power scraper if they would rather hand or power scrape. Several of the Practical Machinist forum members are my student. I am teaching a class this week at a rebuld company in Rosco, IL https://www.allworldmachinery.com/services/machine-rebuild-retrofitting
and 2 of the students are from Bourn & Koch of Rockford IL.
.https://www.bourn-koch.com/remanufactured-blanchard-grinders-fellows-shapers/
I'll help more next week, but I am involved teaching this week.
 
Having a powered scraper is the first step downhill in my book.
It is a tool for latter years to do fast.
We learn to crawl. Once really good at that we do a support thing and stand. Given time we walk. Given more we run.
Running is powered scarper tool.
OH, I have a baix..... Does this make one good or a true fool? These are brutal machines and I would guess so many used wrong.
BOB you have to be taught how to use the scraper - Come to one of my classes some day or watch You Tube shows like NYC CNC Richard King Scraping. The 2nd video shows a Swiss student who power scrapes 5 axis watch making machines.
Biax Germany You Tube show.
 
Sorry for being late to the party: You can ask my many students who learned how to properly use the BIAX power scraper if they would rather hand or power scrape. Several of the Practical Machinist forum members are my student. I am teaching a class this week at a rebuld company in Rosco, IL https://www.allworldmachinery.com/services/machine-rebuild-retrofitting
and 2 of the students are from Bourn & Koch of Rockford IL.
.https://www.bourn-koch.com/remanufactured-blanchard-grinders-fellows-shapers/
I'll help more next week, but I am involved teaching this week.
I am one of Richard's students ... well, not actually his student. The class was taught by his very capable son, because Richard was ill. I claim to be in the top 5% of his stupidest students (maybe even most stupid). I found the Biax to be similar to a power floor buffer in that it's impossible to control until you learn the secret -- at least that was my experience. Actually, for me, the Biax was harder to tame than the floor buffer. About the last couple hours of the class, I almost got the hang of it. Yes, I would rather power scrape.
 
My (limited) experience, and what I've seen documented, is that a proper print is gossamer thin and borderline difficult to see without good lighting and a keen eye. That's why I pointed out that your prints looked heavy (or that you were doing some great photography to resolve it so well.) You are also using a contrast layer (a good thing) but that's potentially additive to the layer thickness as well. I suspect that the inks you have are fine, you just need to thin them more and adapt to the really transparent prints they will produce. Using a sharpie to outline your targets to compensate for the faint print while you are working is a commonly used aid.

As far as the scratches that people have been discussing, I suspect that this is due to invisible chips in the carbide edge that need to be lapped out when you sharpen the blade. Even though the blade looks good under basic magnification, these tiny defects to the edge create linear scratches instead of a clean scrape. To be honest, I think that these scratches are mostly cosmetic (and can even look good sometimes), but they can potentially contribute to chatter when doing the next set of scrapes perpendicular, so it may start stacking up errors. Either way, a lap is easy to rig up and use, and will create nice clean scrapes and make the feedback of the tool a bit better.

The stroke length of the scrapes do look a bit longer than your setting would suggest, I wonder if the foam isolator that you are using in that power train is allowing more travel (overshoot) than you expect? Using the rail itself as the moving part is quite clever, but that's a lot of reciprocating mass and it may be throwing the tool around and extending the scrape. Without seeing it in action it's hard to say, but the scrape marks tell the ultimate story, so measure the actual scrape length to make sure you are setting it to what you want.

When you want to circle back to step scraping that second surface and ensuring squareness, open a new thread for it as I think it will be a useful example and 'I have some thoughts' on how you can pull it off with minimal reference tools. Keep your eyes open for a precision square in the meantime though, as that will make it much easier.
Thank for the comments. Attached is a photo of my latest scraping of the indicator base using the red instead of the blue. The colors act the same, so I probably did not get the wrong stuff. Just need to get it thinner on the plate.

I checked the scraping edges with a fingernail and also a 25x microscope. They felt and looked very smooth. Surely that is an adequate test?

I am confident of the stroke lengths as I measured them before marking the numbers on the setting dial. I think that what you think is an isolator is actually a pair of thick felt washers that I put on both sides of the self aligning bearing (an open bearing) at the small end of the connecting rod. It is entirely possible though that I am running the passes together or the machine vibration is adding to the stroke. I will measure a single pass and see.
 

Attachments

  • indicator base.jpg
    indicator base.jpg
    1.5 MB · Views: 27
I checked the scraping edges with a fingernail and also a 25x microscope. They felt and looked very smooth. Surely that is an adequate test?

The fingernail test checks sharpness, it doesn't tell you anything about edge quality. The serrations on the blade edge that caused the parallel groove patterns were too small for me to see with basic magnification, but on the scrape itself they are obvious. The lines can create a nice optical effect, but seem to be discouraged, again I suspect they can possibly increase the tendency for chatter. A fine diamond lap (1000-3000 grit) will smooth out that edge. The more uniform the edge, the stronger it will be so it should stay sharp longer as well.

HP_Module.jpeg

If you look at (click to see full size) the factory scraping of this tiny Japanese plate you can see what I'm talking about with the parallel grooves. They are a very consistent pattern here, which looks better than the random patterns I was getting when I was first sharpening my blades without a honing step, but I think that's what people are pointing out. Again, I don't know if this is a real problem or an aesthetic choice, but chatter or blade life would be the two most obvious arguments against it.

I am confident of the stroke lengths as I measured them before marking the numbers on the setting dial. I think that what you think is an isolator is actually a pair of thick felt washers that I put on both sides of the self aligning bearing (an open bearing) at the small end of the connecting rod. It is entirely possible though that I am running the passes together or the machine vibration is adding to the stroke. I will measure a single pass and see.
Ahh, it wasn't clear what those were doing or how rigid that joint was. The measurement will obviously tell you what the stroke actually is. One thing about the Biax is that the main difference between the medium and heavy scrapers is the density of the metal used in the front castings. The tool weight is absolutely a factor in the operation, and your tool has a very high reciprocating weight to mass ratio. So you may want to think about adding some ballast to the body (or as you seem pretty adept a counter balance is even more elegant.)
 
The fingernail test checks sharpness, it doesn't tell you anything about edge quality. The serrations on the blade edge that caused the parallel groove patterns were too small for me to see with basic magnification, but on the scrape itself they are obvious. The lines can create a nice optical effect, but seem to be discouraged, again I suspect they can possibly increase the tendency for chatter. A fine diamond lap (1000-3000 grit) will smooth out that edge. The more uniform the edge, the stronger it will be so it should stay sharp longer as well.

View attachment 390924

If you look at (click to see full size) the factory scraping of this tiny Japanese plate you can see what I'm talking about with the parallel grooves. They are a very consistent pattern here, which looks better than the random patterns I was getting when I was first sharpening my blades without a honing step, but I think that's what people are pointing out. Again, I don't know if this is a real problem or an aesthetic choice, but chatter or blade life would be the two most obvious arguments against it.


Ahh, it wasn't clear what those were doing or how rigid that joint was. The measurement will obviously tell you what the stroke actually is. One thing about the Biax is that the main difference between the medium and heavy scrapers is the density of the metal used in the front castings. The tool weight is absolutely a factor in the operation, and your tool has a very high reciprocating weight to mass ratio. So you may want to think about adding some ballast to the body (or as you seem pretty adept a counter balance is even more elegant.)
I wasn't running my fingernail across the edge, but along the edge. It felt totally smooth. I do have a lapping setup (pic attached) that I have been sharpening with. The grit is 2000. But just for fun I'll start over again at 320 grit and work up to 2000 again to totally refresh the edges.

I tried to find the scraping in the pic that you posted and couldn't see it. I see lots of sealer though. Where is the scraping?

My scraper weighs 8# which is very close to the medium Biax. There is a fair amount of steel under the plastic housing. There is a counterweight on the crank, much like a crankshaft in an engine. Rotary rather than linear motion so not ideal, but better than nothing.

By the way, thanks for your suggestions and I hope you will keep them coming! You have a good analytical thought process.
 

Attachments

  • buffer.jpg
    buffer.jpg
    909.4 KB · Views: 27
I wasn't running my fingernail across the edge, but along the edge. It felt totally smooth. I do have a lapping setup (pic attached) that I have been sharpening with. The grit is 2000. But just for fun I'll start over again at 320 grit and work up to 2000 again to totally refresh the edges.

Ahhh, not sure you could even feel them, but maybe it isn't an issue. Let's see how the resharpen goes.

I tried to find the scraping in the pic that you posted and couldn't see it. I see lots of sealer though. Where is the scraping?

LOL, the device is distracting from the little surface plate it is sitting on.

scrape.jpeg

You can see the parallel lines in this close up.

My scraper weighs 8# which is very close to the medium Biax. There is a fair amount of steel under the plastic housing. There is a counterweight on the crank, much like a crankshaft in an engine. Rotary rather than linear motion so not ideal, but better than nothing.

Yep, better than nothing. Let's see if the actual scrape length deviates from your setting.

By the way, thanks for your suggestions and I hope you will keep them coming! You have a good analytical thought process.

I think about scraping (and related subjects) an unhealthy amount...
 
"I read about the need to stress relieve after machining the castings, so I wrapped them in stainless foil and put them in my precision heat treat furnace. Which is a wood stove that we use to heat our workshop. Using an infrared gun thermometer I watched the temp as best I could and it got to a max of 1,300 F and was allowed to cool overnight as the wood was consumed. Both parts were a nice uniform grey color."

So far there has only been one comment on your stress relief method. So, I'll add mine.

I think you can be pretty sure you more than adequately stress relieved your casting as achieving a temp of 1050 is adequate for almost all cast iron. Very high-alloy specialty cast irons may require 1150 or even 1200. But you are not dealing with those alloys and you exceeded those temps in any event.

Contamination from the constituents of the wood fire are really not a concern as it is common to melt cast iron in fuel-fired furnaces in the first place. Those environments are probably at least twice as hot and contain a wild mix of fuel constituents, oxygen and nitrogen all interacting with each other. Having a carbon-rich environment is very desirable and a simple wood bonfire is certain to have excess carbon present. Stainless wrapping your castings was really not necessary but also was harmless. Had you raised your temperatures to annealing levels around 1750, significant scaling would be likely and I do wrap castings to be raised to those temps.

In another thread I pointed out that stress relief after machining sounds like sound practice. But, having machined hundreds of castings, I have seen no evidence of significant stress induction from milling cast iron using standard machining practices. And it is also true that after milling you are going to continue "machining" over and over again using a hand or power scraper that is peeling off iron shavings driven by a carbide cutting edge traveling a SFPM comparable to, and probably in many cases greater than, your face mill SFPM. So, should you stress relieve after each pass? ;-)

Good work so far!

Denis
 
Last edited:
"I read about the need to stress relieve after machining the castings, so I wrapped them in stainless foil and put them in my precision heat treat furnace. Which is a wood stove that we use to heat our workshop. Using an infrared gun thermometer I watched the temp as best I could and it got to a max of 1,300 F and was allowed to cool overnight as the wood was consumed. Both parts were a nice uniform grey color."

So far there has only been one comment on your stress relief method. So, I'll add mine.

I think you can be pretty sure you more than adequately stress relieved your casting as achieving a temp of 1050 is adequate for almost all cast iron. Very high-alloy specialty cast irons may require 1150 or even 1200. But you are not dealing with those alloys and you exceeded those temps in any event.

Contamination from the constituents of the wood fire are really not a concern as it is common to melt cast iron in fuel-fired furnaces in the first place. Those environments are probably at least twice as hot and contain a wild mix of fuel constituents, oxygen and nitrogen all interacting with each other. Having a carbon-rich environment is very desirable and a simple wood bonfire is certain to have excess carbon present. Stainless wrapping your castings was really not necessary but also was harmless. Had you raised your temperatures to annealing levels around 1750, significant scaling would be likely and I do wrap castings to be raised to those temps.

In another thread I pointed out that stress relief after machining sounds like sound practice. But, having machined hundreds of castings, Ihave seen no evidence of significant stress induction from milling cast iron using standard machining practices. And it is also true that after milling you are going to continue "machining" over and over again using a hand or power scraper that is peeling off iron shavings driven by a carbide cutting edge traveling a SFPM comparable to, and probably in many cases greater than, your face mill SFPM. So, should you stress relieve after each pass? ;-)

Good work so far!

Denis
Thank you!
 
Ahhh, not sure you could even feel them, but maybe it isn't an issue. Let's see how the resharpen goes.


LOL, the device is distracting from the little surface plate it is sitting on.

View attachment 390937

You can see the parallel lines in this close up.


Yep, better than nothing. Let's see if the actual scrape length deviates from your setting.


I think about scraping (and related subjects) an unhealthy amount...
The measured stroke lengths are slightly less than what the setting dial says.
 
At this point I feel stymied by the issues I'm having with the ink that I am using. It dries way too fast to be usable. Not totally dry, but dry enough that it is incredibly viscous, like the stuff that makes old syrup bottle caps hard to remove. I can't seem to get a clear impression from it no matter how I try to thin it, roll it or whatever. I can get a smeary blob impression (per the previously posted pics) or a very faint ghost of blue that is little help. I plan to contact the dealer that I bought the Charbonnel Aqua Wash from Monday. Hopefully they have an answer. On a positive note, I have scraped a Brown and Sharpe indicator base top and bottom to within +/- .0001" by coating the entire part with ink and scraping the shiny spots that were revealed after rubbing on a dry surface plate. I don't know how to check points per square inch at the moment, but maybe when I get the ink problem sorted out I will be able to.
 
I wish I could offer some advice, but the materials I have here in Japan are likely unobtainable anywhere else. I managed to get a couple quarts of the Artco Canode in blue and yellow when I heard that they were stopping production, but I haven't even tried them yet. I've been using Trusco TBP-H Part #(299-6782) which is oil based and organic pigment, and it works quite well. I have an 'inorganic' pigment variant too, but haven't tried it yet. Obviously the oil based inks require more care to keep them from getting all over everything, but cheap plastic gloves and a lot of paper shop towels isn't a big hindrance. (Someone here rightly called me out for being cowardly to not just try the oil based stuff when I was waiting on the Canode to arrive.)

I'm sure you've seen the other posts of various home brews and alternatives, I'd imagine that there must be a number of drying inhibitors for water based paints used by artists. Here in Japan the old school guys still use red lead, and I'm pretty sure it is still sold here. Robin Renzetti has a nice system that may be worth emulating that uses it.
 
I have chart I will try to attach here. I sell a DVD on scraping and I'll give you a deal on it any members who want to buy one. MK message me your email or phone number and I'll call you and try to tell you how. Sometimes it's easier to hear how then to read how. What is the temperature of the room your scraping in? A cold room will screw up how it spreads. Are you using 2 colors? Last week one of my students used to work for Ingersoll the new machine dealer and he introduced me to a red powder you mix with oil and lacquer thinner and make a paste. I am going to order some and test it and if it works good, I'll share the results. I have a couple of cases of Canode blue and yellow.
Contacting the Charbonnel distributer won't help any as it wasn't designed to use as bearing blue. It's aan ink and it is suppose to dry. You have to mix it with Canode to make it work. If you want the best buy some Dykem high spot bluing in a tube. But be prepared for stained fingers

I have tried to add the chart but it says to large a file. I'll do it tomorrow . I'm to tired to do it now.
 
Last edited:


Back
Top