tfmetal
Plastic
- Joined
- Aug 14, 2008
- Location
- Vancouver, BC
Hello members,
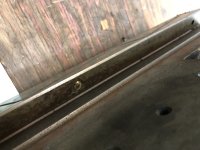
Unfortunately my early 50's lever FP1 came without a Z axis lockout lever. It appears as though someone may have tried to repair the hole as the inner threads are damaged. The insert is still in the hole (appears to be brass or similar) and can still move slightly back and forth but it's captured. Has anyone taken these inserts out? I would assume they would come out the lever side, once the lever is removed. It will likely be fairly difficult to press it out as it's in the dovetail, might have to make a jig. I am considering machining the hole larger, pushing out the insert and then making my own plug and handle assembly. Any advice would be greatly appreciated. Also, if anyone has a picture of one taken apart, that would be great. Hard to tell from the exploded diagrams in the manual if there are internal features required (although seems quite simple). Of course I did consider taking another one of the locking levers apart but pressing those pins out is not something I want to do. Thanks!


Unfortunately my early 50's lever FP1 came without a Z axis lockout lever. It appears as though someone may have tried to repair the hole as the inner threads are damaged. The insert is still in the hole (appears to be brass or similar) and can still move slightly back and forth but it's captured. Has anyone taken these inserts out? I would assume they would come out the lever side, once the lever is removed. It will likely be fairly difficult to press it out as it's in the dovetail, might have to make a jig. I am considering machining the hole larger, pushing out the insert and then making my own plug and handle assembly. Any advice would be greatly appreciated. Also, if anyone has a picture of one taken apart, that would be great. Hard to tell from the exploded diagrams in the manual if there are internal features required (although seems quite simple). Of course I did consider taking another one of the locking levers apart but pressing those pins out is not something I want to do. Thanks!


