What's new
What's new

How to control size of tiny chamfers/edge breaks on internal features such as small drilled holes?

Springy

Plastic
Joined
Oct 22, 2021
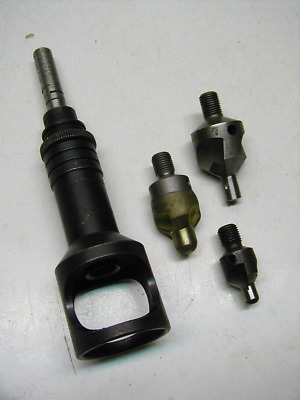
Does anyone have a good method for measuring or gauging the size of small chamfers/edge breaks on the entry to small holes? Hole in question is 0.09375" (3/32" or 2.38mm) diameter, drilled blind hole. Chamfer needs to be kept small and it needs to be consistent across part runs to within about +/-0.002" on outer diameter as the chamfer's OD is the projected/pressurized area of a valve seat and the consistency of its opening characteristic is critical. We are still assessing the best deburring method for this hole too - unsure whether we'll use a standard 45deg chamfer or something else (eg a 60deg chamfer or a rounded corner) because being burr-free on the flat seating surface is critical but so is the pressurized area. Material is 7075.

Is this something that could be done best an optical measurement like a vision system? We don't have a CMM or vision system, just hand tools. We could make some go/no-go gauge pins for this perhaps, for visual assessment with a microscope. Are there other ways that might work better? There are other elements like this that we'll need to measure soon that are not circular, where gauge pins might not be an option as a result, so any suggestions would be super helpful.
 
Could you use a go/no go air gauge with a conical projection, a flat face and two holes in the flat face, one on either side of the projection? If the chamfer is too shallow, it won't be able to seal both holes.
 
If you are machining the surface drilled in the same op your accuracy is as good as your tool setter and your machine. A 45 csink is twice the diameter for depth so to get +-.002 your stack is +- .001
 
Could you use a go/no go air gauge with a conical projection, a flat face and two holes in the flat face, one on either side of the projection? If the chamfer is too shallow, it won't be able to seal both holes.

I don't think we have the space for that within the part, and I'm not entirely sure how we'd validate the conical element for the gauge either, or make sure the chamfer is not too deep.
 
If you are machining the surface drilled in the same op your accuracy is as good as your tool setter and your machine. A 45 csink is twice the diameter for depth so to get +-.002 your stack is +- .001
Yes, it's all in one op. We have sub-micron resolution and extremely good repeatability on this machine (gang tools on a swiss lathe), so I'm quite confident that once we get it dialled in it'll be able to hold that just fine.
 
Machine a cone with a shoulder. Use feeler gauges or gauge blocks to measure the distance from the face of the part to the shoulder. Multiply by a constant related to your cone angle and you'll have the opening diameter.
 
I don't think we have the space for that within the part, and I'm not entirely sure how we'd validate the conical element for the gauge either, or make sure the chamfer is not too deep.
Validating the cone is easy. It's a external profile feature, so an optical comparator, measuring microscope or similar would do you there. Backlighting and measuring a profile is easy. If you have to find just the right lighting to measure an internal feature, that's a lot harder to be consistent with.
 
You could check it using face projection on a comparator, or if you don’t want to spend on that, just grind the high and low gage pin ends flat.
You’ll feel the GO click in and the NO GO slide over the top.
 
You can also place a ball bearing on the hole and use a height gauge on it. With some math or CAD to figure out the correct value.

You can also set the part face down on a 2d scanner, if the geometry is suitable.
 
If possible, do the hole with a form tool that incorporates a shallow counterbore. Qualify the tool before using. Another possibility would be leave the corner square and coin the chamfer with a tool that registers against the face.
 
Validating the cone is easy. It's a external profile feature, so an optical comparator, measuring microscope or similar would do you there. Backlighting and measuring a profile is easy. If you have to find just the right lighting to measure an internal feature, that's a lot harder to be consistent with.
We don't have an optical comparator unfortunately.
 
If you're considering hand tools something along these lines might work. Magnavon and others make micro stops for setting rivets in aircraft assemblies. I also use them for consistent depth when countersinking. You might also be able to fabricate something along these lines that will work in your machine.

The micro stops and countersinks come in a variety of sizes and angles. I have 1/4", 3,8", and 1/2" diameter countersinks with angles of 45*, 60*, 82*, 90*, and 100*.


Back
Top