What's new
What's new

Micromaster 510 Surface Finish and Vibration

Was wondering whether you’d see the same periodicity electrically, and/or perhaps you’re seeing a higher frequency effect but your sampling frequency is making it look like ~190hz?

With regard to the bearings, wondering what the periodicity is of each ball making a full rotation?

Also thinking you might have improved things enough already that the motor balance is no longer the worst source of surface finish contributors…

Phil
 
Bearings are a definite possibility. Also, is the pulley a good tight fit? Loose pulley might could cause weird vibrations. I'd look for anything loose like that, then consider better bearings if you think the vibration will be a problem.
 
I used this bearing vibration calculator for 6203 bearing and there is no match for the 190hz. Brandenberger message inspired me to simply reinstall the motor and see if this is good enough.

Wow, the difference is incredible ! I can barely feel any vibration on the wheel guard now !

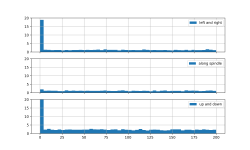
I moved my accelerometer on the spindle and here some of the reading. Motor Only:

motor.png
With the spindle belt installed:
spindle.png
With a balanced wheel:
wheel.png
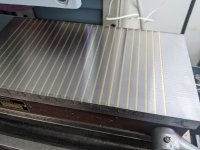
I did not have time to do a proper grinding test, but I did a quick test and I am mostly seeing line in the direction of the table travel. There is still some ripple but things seem to be much better.

PXL_20220802_233125568_50.jpg

I think at this point this is good enough to start working on my technique and stop blaming the machine. We will see how good a surface finish I can get with some practice.
 
My belief is any residual vibration probably gets cancelled out when you dress the wheel. Hint- it will actually dress a tiny bit out of round. Now, give it a coarse dress and see what you can do! Remember, soft metal grinds like crap compared to hard metal. Don't get me wrong; you can grind a decent finish on big flat washers and such, but it won't hold a candle to what you can do with hardened tool steel.
 
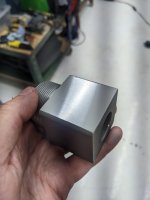
Today I had the chance to play a bit with the grinder. The first task was grinding the chuck

PXL_20220803_114732976_50.jpg
That first attempt was pretty bad but the second one was a bit better:
PXL_20220803_115941079.MP_50.jpg
I then play around with correcting some AliExpress ER32 collect block.

PXL_20220803_210620794_50.jpg

I am pretty happy with the surface finish I am getting and the accuracy. I was able to keep all the faces parralel to the collect axis within 0.0002". For my first attempt at grinding something, I am pretty happy.

I think this conclude this project.

What's next:

I need to remove the rubber pad under the machine. The entire machine is shaking when moving the Z axis and I think it might be the cause of the longitudinal lines.

I learn the hard way with the collect block about thermal expansion and would really like to try flood cooling. I have all the guard on the grinder for wet grinding but missing the tank, I will start a thread soon to try to figure out what is my best option for a tank and coolant.

I would really like to hard mount the accelerometer and maybe add a spindle position sensor. That would allow me to calibrate the system to simply tell me what weight to add where on a new wheel to quickly balance it. I am thinking of also building a small open source tool to do so.

One day, I would really like build a 2 plane balancing machine, we will see if I ever get there.

Thanks to everyone who help.
 
Last edited:
*Nice looking grinding.
For about 10 bucks one can buy a small submersible aquarium pump, and with a five-gallon bucket have a fine, once in a while coolant system. .. add a 1/4 cup washing soda and have some OK coolant.
The washing soda makes the coolant anti-rusting (but parts being clean should have a wipe of oil.
(* not baking soda)
This kind of coolant that is safe to dump on the ground,
A grinder set on (painted black) hardwood blocks is good, or just any wood blocks.
(Painted because a machine setting on wood blocks may look shoddy).
 
Last edited:
  • Like
Reactions: DJ2
New to grinding..setting parts all about the chuck will keep the chuck flat longer, hone a nice bevel to all chuck edges, pick up some steel blocks and practice making dead-square, keep a good size stone/hone just for the chuck and practice smooth-side light honing the whole chuck to avoid small spot honing. (2" x 6" Norton stone is good.)
Good to post the wheel you use when displaying a grinding activity so the new guys will get used to wheel talk..and avoid the axis letters use long, cross and down..
Post often because we need more grinding talk on PM.
 
Last edited:


Back
Top