What's new
What's new

Out-of-Storage Day: Kearney Treaker 2H Plain

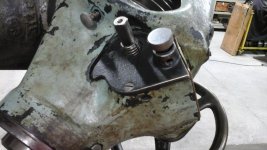
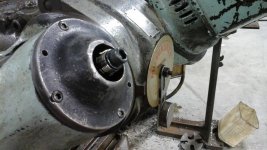
Yes they are 50 taper. Unfortinatly I've only got the one support pictured. Others are on the long list of wish-list items :crazy:. I could really use an A style support as I have a few nippled arbors (I always get A and B confused though. The support with a through bearing is a B correct?) I could see setting up multiple cutters between multiple supports as a handy set-up. A majority of the jobs I do on the horizontals involve simple plaining and squaring up ops like the one pictured so while it's keeping itself preocupied, I can be at the Bridgeport drilling holes and such.

I just went back and looked at your photo and B style support you have is an intermediate type (note that is doesn't have the bolt holes for overarm brace). On a 2H or 2HL that was a special order normally those models shipped with an "A" (small pilot) and the standard "B" arbor support.
 
I just went back and looked at your photo and B style support you have is an intermediate type (note that is doesn't have the bolt holes for overarm brace). On a 2H or 2HL that was a special order normally those models shipped with an "A" (small pilot) and the standard "B" arbor support.

From early K&T sales brochure probably ww2 vintage on 2h plain milling machine:


Ramsay 1:)
 

Attachments

  • IMG_0001.jpg
    IMG_0001.jpg
    18.9 KB · Views: 50
  • IMG_0002.jpg
    IMG_0002.jpg
    36.6 KB · Views: 63
I just went back and looked at your photo and B style support you have is an intermediate type (note that is doesn't have the bolt holes for overarm brace). On a 2H or 2HL that was a special order normally those models shipped with an "A" (small pilot) and the standard "B" arbor support.

Interesting. I would have thought that the support to use with an overarm bracket would be an A style since most of the set-up pictures I've seen have the whole assembly situated towards the front of the knee. But I suppose you'd want the added bearing surface if your job required the extra support.

I started going through all our NMTB 50 holders the other night and getting them laid out with basic general use cutters. When the Cincinatti 2L was online, I was limited to a 7/8" A style arbor because that was the only support we have with that machine. A 1" endmill in a long projection holder saw alot of use. There are a couple of good 'crashes' on the cart that will take some effort to salvage. One is a 1" stub arbor with no pilot that has quite a noticable bend and twist to it. I took it as a good visual lesson in supporting the cutter:ill:. If I can get it straight, It should be handy for thin slitting blades at least.
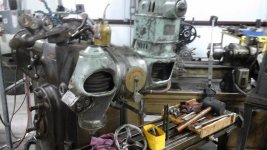
 
Happy Friday!

20170211_011829.jpg

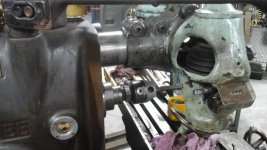
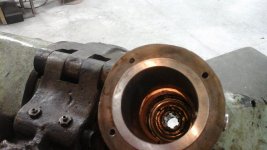
So I finally got the Midgetmill adapter bored out and mounted tonight. It took awhile as I had to go 1.75 IPM at 153 RPM to keep the boring bar from chattering. I tried to set it up to bore on a bridgeport but the set-up was wonky so I desided to let this mill "fix itself". I maxed out the cross travel on the mill with the boring opperation. A lower profile boring head mount is on the too-do list.

I've linked below the old thread discussing the midgetmill head up to this point. Next step is to clean and oil it up. The Thou-meter and handwheel assembly is nasty and full of little bitty pieces, but it's coming apart. I need to replace the shaft which the handwheel mounts to.
20170211_011758.jpg
20170211_011810.jpg

Fun milling ahead!:D

http://www.practicalmachinist.com/vb/cincinnati-milacron-kearney-trecker-vn-usa-heavy-iron/milwaukee-midget-mill-head-236046/
 
Hello: What size was the socket on the midgetmill originally? Mine was too big for either my 2h or 2hl so I had to make bushings for both... I much prefer using the midgetmill on my 2h though as it is much easier to control the overarm travel.. Ramsay 1:)
 
Hello: What size was the socket on the midgetmill originally? Mine was too big for either my 2h or 2hl so I had to make bushings for both... I much prefer using the midgetmill on my 2h though as it is much easier to control the overarm travel.. Ramsay 1:)

Started as 2 1/2 diameter after I removed a split bushing from it, bored to 2 5/8. I think I posted about it early on in the Yahoo group in case someone wanted to trade adapters.

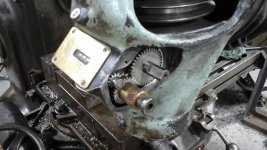
I'm thinking about mounting the other head on my Cincinnatti 2L once it's welded back together. I've only got the one adapter so I'll make that one out of a weldment of plate steel with the heads circular bore on one side and a dovetail mount on the other.
 
So I made some progress on the midgetmill head. If anyone needs one, the motor power cord uses a ML1 series twist lock plug (Leviton 069-ML1-C).
1488417042947-1743091291.jpg

Replaced the belt with a 3L-35.

The upper bearing above the spindle cone pulley was dead. It's replacement was a 6206 series shielded bearing.
 
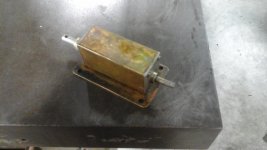
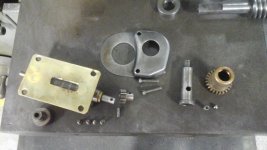
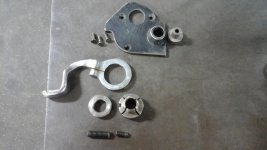
I finally got the quill and Thou-meter all apart. It was a little tricky so I'll show the reassembly for anyone who needs help with theirs.

1488417356184-330418652.jpg
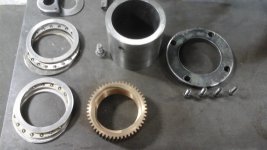
The brass gear is what raises and lowers the quill. It has a thrust bearing on either side and the big sleeve goes in under them to retain it all. The screw beside it retains the sleeve as well as slides into a slot in the quill cartridge to keep it from spinning as it moves up and down.
1488417603147-1613073037.jpg
14884177870431082443434.jpg
Those pieces together.
 
148841805778666698350.jpg
The pinion gear is broken, so I'm leaving it out until I can "borrow" the one out of the old head and get a couple new bearings for it.

1488418211642-1941208398.jpg
1488418240419-1021594511.jpg
The Thou-meter is a pre-assembled cartridge made by Veeder-root Inc., Hartford, CT. It works well, so it's not coming apart. I'll put some lightweight oil on the shaft ends and call it good.
1488418403764-1572072048.jpg
I had a hard time getting the Thou-meter out of the head, but eventually found that it's gear is held on with a small dowel pin.
1488418531329-2029006000.jpg
 
1488420029574-28620412.jpg
The meter engageing gear has a detent ball bearing. Be aware of that when you take it apart.
1488420183608-392340.jpg
The dowel pin on the end of the meter needs to sit flush in its hole or it will get in the way of the gears meshing.
 
1488420867857-1590136951.jpg
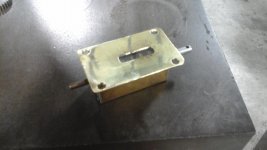
The spindle cartridge. The preload feels good so I'm not pulling this ons apart either. The cartridge just threads into the brass worm gear and is retained by the screw shown before.

This head was full of hardened axle grease, but looking at how it goes together, it looks like the spindle bearings would get oiled from oil running down the spline. There is an oil cap on the face of the mill but it looks like it just oils the pinion gear, worm gear, and thrust bearings.
 
20170308_083255.jpg
Got the pinion bearings now. Originals are a S5RPP series. I had to back the spindle and worm gear out to install the pinion and its bearings (best to put the pinion in first next time) those parts need to slip in through the back side, the side with the quill lock.
1488985899415117529799.jpg
The quill lock "collet" clamps around the pinion gear. It lines up with a dog point set screw in the casting. That set screw has a larger set screw keeping it in place.
20170308_083313.jpg
Another part I borrowed, and will eventually need to replicate, from the old milling head, is the chrome handle for the quill lock.

I'm using Lubriplate 105 for all the pieces that don't have provision for oiling.
 
1488992624380-1613073037.jpg
The reset knob for the Thou-meter is held on by a little allen screw accessable through a hole in the cover plate casting, and needs to be removed to remove the plate.

The quill lock is wore and not clamping right now. The collet has a straight bore ID, and a tapered acme thread OD with matching nut. The nut is bottoming out against the cover plate so I'm going to surface grind the inside face so that it can tighten down a little further. Otherwise it looks like I'll need to make a replacement collet.... not looking forward to cutting that weird thread.

1488992926298117529799.jpg
The draw-bar is an off-the-shelf 3/8-16 12"long allen bolt, with a 3/8"-3/4" hardened washer (also generic). This head like the old head is missing the quill-cap, which would fill in the space around the bolt head and give a knurled face to turn the spindle with. I have dimensions for it from one of the other Midgetmill users out there, but I'm going to manipulate the height of it to work with the 12" drawbar. The original drawbar was a shorter, non-standard length.
 
Great write up. It looks like everything is working out. Those parts look a lot better on your machine than they did sitting under my bench. :cheers:
Andy


Back
Top