What's new
What's new

Pratt & Whitney 12C Restoration Pictures

I’m going to controversial here because I know this is a subject that lots of US machine tool owners have difficulty with. Is there provision for fastening the machine to the floor ?

Regards Tyrone.
 
I’m going to controversial here because I know this is a subject that lots of US machine tool owners have difficulty with. Is there provision for fastening the machine to the floor ?

Regards Tyrone.

The first two pictures are of the machine’s leveling screws and provisions for tie-down. There is a through hole in the middle of these bolts.

The last two pictures are what I could find in Pratt & Whitney’s instruction book on leveling and bolting the machine down.
 

Attachments

  • IMG_0465.jpg
    IMG_0465.jpg
    89.3 KB · Views: 29
  • IMG_0466.jpg
    IMG_0466.jpg
    88.6 KB · Views: 26
  • IMG_0467.jpg
    IMG_0467.jpg
    98.2 KB · Views: 26
  • IMG_0468.jpg
    IMG_0468.jpg
    96.1 KB · Views: 24
The first two pictures are of the machine’s leveling screws and provisions for tie-down. There is a through hole in the middle of these bolts.

The last two pictures are what I could find in Pratt & Whitney’s instruction book on leveling and bolting the machine down.

Interesting. I see you have the same aversion to fastening the lathe down that I’ve noticed in other installations in the US.

I was watching a video the other day were a guy in the US had installed a really nice relatively modern lathe. He was showing watchers how to level up the lathe. This particular lathe had the conventional set up of a hole in the base for the holding down bolt and a set screw adjacent to the hole for jacking screw purposes. The guy had ignored the jacking screw completely and had rigged up a length of screwed rod in the holding down bolt hole. The screwed rod had a nut and a large washer on either side of the hole in the base. The business end of the screwed rod was bearing down on a metal plate. He was using this arrangement to level the lathe up.

I was puzzled as to why he was using this method of installation.

Regards Tyrone.
 
Interesting. I see you have the same aversion to fastening the lathe down that I’ve noticed in other installations in the US....

Regards Tyrone.

I’m not so sure it is an aversion as it is a reluctance with this past year being a good example. I recently sold a lathe that was sitting in the middle of my shop. It required the removal of three other machines to get to it. Once the new lathe was in place, it would of course not have matched the original footprint of the other thus it would have required more holes. Based on the number of times I’ve moved my machines, I would have a lot of holes by now.

I do however believe that machines such as the Pratt & Whitney and the American Pacemaker which sit on independent pedestals might benefit somewhat from being bolted down in terms of rigidity and stiffness. But I have not found these two qualities lacking in either machine. I would be very interested in hearing your views on this subject given your experience.

Well I’ve upset a few people before by banging on about this subject so I’m loathe to go there again. I try really hard not upset people. But like a moth to a flame here goes.

I’m in favour of bolting machines down to a proper foundation if the manufacturers have designed the machine with that idea in mind. If they’ve put a series of plain holes in the base of the machine at strategic locations it’s pretty obvious to me what they had in mind. Done properly you don’t have to keep re-levelling the machine so often. Plus I’m a firm believer that coupling the machine to a proper concrete foundation helps to damp down vibrations and reduce chatter somewhat..

On the bigger machines having holding down bolts helps you to pull down the elements of the machine instead of relying on the weight of the machine alone. On a slightly worn lathe bed you can “ bend it straight again “ as we used to say. When you’ve aligning the headstock in the vertical plane with your test bar it’s handy to be able to tweak the headstock rear holding down bolts/jack screws. The same thing applies to the tailstock end of the lathe bed.

I’ve watched dozens of videos of the “ how to level and align your lathe “ variety and some of them are pretty amateurish. I’ve yet to see one were the job is done in what I consider the correct, professional, method.

A lot of owners, and I include some managers of decent sized companies in this, see foundations as a waste of money. I don’t think they are.

I appreciate the point you make about the difficulties involved with moving machinery around. After all it’s your shop and your machines, you can do as you please.

Regards Tyrone.
 
I liked the machines with squared off headstock. The ones with the flat headstock cover not the domed headstock cover. Having said that anything from “ DSG “ was top notch “. They never made a bad machine. The CNC machines that came out around the time of the “ Monarch “ tie up were excellent machines also.

“ Lang “ was another really excellent British lathe, they were made in Scotland, they’re also a nation with an excellent reputation in the engineering world.

If we’re talking really big lathes “ Craven “ and “ Swift “ took some beating.

Regards Tyrone.

A little OT but as some DSG were mentioned. I saw this in the machinery for sale section. The craigslist link only has a few pics, and none looking at the front of machine:
Dean Smith & Grace 1709x60 Lathe For Sale
 
I do use Glyptal 1201 in both quart and spray. I prefer the quart as it is a little thicker. I usually just brush it on the inside of a gear box then I always make sure to “bake” it. I do this by wrapping it in a welding blanket and dropping a 100-watt light bulb inside, leaving it over night or so. This speeds up the curing process. If you do use it in a gear box, I recommend waiting until it is hard enough that you can’t stick a fingernail in it before you add oil. Also, you must make sure that whatever you apply it to is completely degreased.

I shortened your quote from post #91 to save real-estate. Nice pics there for those interested:
Pratt & Whitney 12C Restoration Pictures

During our discussions I was eyeballing a qt of 1201 from an ebay seller that had several. Only to find them totally missing the next day :D. Not the first time these forums have helped sell stuff.

This led to what I'll consider as a bit of twist in good karma, in that I got to learn something. I began looking for actual dealers and such. First I found an advert with a pic of an older can that has a GE symbol:

163.jpg

Then going to Glyptal's home page, discovered they were a fluids research branch of GE. A minor history wrote here:
Glytpal-Home

And in doing some reading, it seems that 1201 and 1201B were used in GE electric motors and some train applications.

1201B apparently an extra thick version of 1201. You had mentioned it was thick, I was wondering if you used the B version or regular 1201.

It seems they have some other colors of 1201 insulating enamel as well, if you look at their products page:
Glytpal-Products

I posted pretty much the same info in the Antique section for an electric motor thread. An old and long thread which is real nice. For those interested the thread is here:
Old Electric Motors
 
... 1201B apparently an extra thick version of 1201. You had mentioned it was thick, I was wondering if you used the B version or regular 1201....

Texasgunsmith: In answer to you question above... I just used the regular 1201 (red) version and also used the aerosol can version. I’ve also thinned and sprayed the regular 1201 through a spray gun. They make a thinner for it, or you can make your own thinner with a couple of solvents. Either way it all works pretty well. I’ve always liked to use it, especially in gear boxes, because it is dependable. It is pretty expensive stuff as you probably found out, but both the can and spray go quite a ways especially when it is cooler.

I did know Glyptal had been around many years and that it was originally developed for electric motors. Through the years they have added to their lineup as well as their price.
 
These are all pictures of the motor starter and electrical wiring which were all disassembled and cleaned including the contacts. The motor was disassembled, cleaned and megger tested by a local motor shop. I replaced bearings in the motor. They had a hard time finding these as they were a ball bearing with extended inner and outer races. I ended up going with a double row ball bearing in each end. That worked fine, and I even gained a little load capacity.
 

Attachments

  • IMG_2075.jpg
    IMG_2075.jpg
    92.4 KB · Views: 19
  • IMG_2074.jpg
    IMG_2074.jpg
    94.5 KB · Views: 20
  • IMG_2073.jpg
    IMG_2073.jpg
    94.8 KB · Views: 19
The first four pictures are of the electrical cabinets being readied for filler and high build primer. The last picture is of the internals of an electrical cabinet after paint.
 

Attachments

  • IMG_2076.jpg
    IMG_2076.jpg
    91.7 KB · Views: 22
  • IMG_2077.jpg
    IMG_2077.jpg
    91.3 KB · Views: 18
  • IMG_2078.jpg
    IMG_2078.jpg
    89.3 KB · Views: 16
  • IMG_2080.jpg
    IMG_2080.jpg
    84.6 KB · Views: 21
  • IMG_1433.jpg
    IMG_1433.jpg
    92.3 KB · Views: 22
These are all pictures of the backsplash. The first is of it before modifications. The next two are after the modifications. I added stiffeners to the back and an easy-to-remove clamp system. I also bent the top over for a later installation of a light.

One side note, this backsplash was, I believe, originally made by Pratt & Whitney. The reason I believe so is the original primers and filler coats and finish coats were all the same as were on the rest of the lathe.


I’ve seen several different types of electrical setups on these machines. I’ve also seen some customization on things like backsplashes and other accessories. Maybe they were a little like Monarch in that they were willing to do things differently if you were willing to pay. It makes me wonder how much that backsplash might have cost.

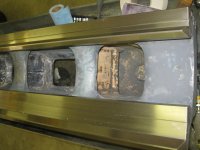
The last two pictures are of the bed and headstock removed from the base and chip tray. One note on this is that between the chip tray and the pedestal castings, Pratt & Whitney used shims which have to be kept track of and installed back in their original locations.
 

Attachments

  • IMG_1741.jpg
    IMG_1741.jpg
    91.2 KB · Views: 24
  • IMG_1786.jpg
    IMG_1786.jpg
    90.7 KB · Views: 29
  • IMG_1785.jpg
    IMG_1785.jpg
    85.3 KB · Views: 27
  • IMG_1784.jpg
    IMG_1784.jpg
    87.8 KB · Views: 25
  • IMG_1750.jpg
    IMG_1750.jpg
    90.4 KB · Views: 26
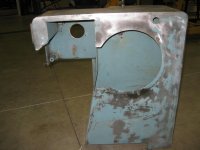
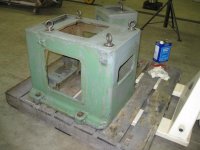
These are shots of the pedestal bases. What I believe is the original paint color can be seen in the last picture.

I used a 3,800 lb. pressure washer to degrease and wash the bases and the backsplash. I tried to not only remove the grease and oil but to blast loose any loose fillers and as much old paint as possible.

The last two are after the pressure wash.
 

Attachments

  • IMG_1780.jpg
    IMG_1780.jpg
    93.2 KB · Views: 25
  • IMG_1782.jpg
    IMG_1782.jpg
    92.5 KB · Views: 25
  • IMG_1781.jpg
    IMG_1781.jpg
    91.3 KB · Views: 27
  • IMG_1845.jpg
    IMG_1845.jpg
    91.1 KB · Views: 26
  • IMG_1846.jpg
    IMG_1846.jpg
    90.7 KB · Views: 26
Who are the furry four legged inspectors keeping an eye on your work?

The yellow lab in this set of pictures was Bandit. The brown mix seen in earlier pictures is Bud. He’s a Coon Dog, Australian Shepard, Blue Heeler mix – or in short, a Texas cattle dog. (His dad was an actual working cattle dog – although Bud’s never worked cattle.) The two you haven’t seen are Cinch, an Australian Shepard, and Capitan, a female black lab mix. (The neighborhood kids named her that. I actually haven’t named any of them.)

All of these were dogs from the neighborhood who found their way to my shop at one time or another.

Bandit never really belonged to anyone but was always rather independent. He had rounds that he would make every day, and no one knew for sure how far he went. We heard stories from people who had met Bandit miles away. Occasionally he went by other names. About 1.5 miles down the road from me is an industrial park. At lunch time, when the guys ate their lunches outside in the shade, Bandit would join them and look for a handout. But he usually made his way back to my shop each evening.

I’ll tell one more story because it occurred about the time of this rebuild. My shop is about 5,000 sf. It is divided in the middle by a wall that has a large overhead door and one walkthrough door. The remainder of the six other overhead doors are positioned around the outer walls of the shop. During the summers I keep several of the outer doors open and I position two slow moving fans in the north and south doorways. When the weather is warm, you could always find the four dogs stretched out in front of one of those fans.

I keep a box of Milk Bones (i.e. dog treats) on my desk. I noticed for the better part of a week that I was missing some, even spotting some crumbs. I thought maybe a rat. One afternoon while I was sitting at my desk and the dogs were stretched out, Bandit and I caught a glimpse of something moving in the shop. The alarm was sounded, and the chase was on. It was a small cat. I tried to collect the dogs to let the cat get away but was always too slow and too late. The chase would move on. At one point, I thought the cat had met his end between a Southbend Heavy 10 and the wall. They had cornered him. I had no idea cats could move that fast vertically. And the chase was on again.

I eventually solved this by closing the doors between the shop and isolating the dogs. The cat must have escaped through one of the open doors. Any way I never saw him again.

I felt sorry for the cat. I mean, how desperate do you have to be to take up residence in a shop with four big dogs. It is funny now – not so much then.
 
I have a few more pictures to post before I wrap this up. However, I'm running into an issue with the file size of my pictures. I'll finish this out when I get that figured out.
 
I have a few more pictures to post before I wrap this up. However, I'm running into an issue with the file size of my pictures. I'll finish this out when I get that figured out.
I sent you a potential way to screen capture from a windows pc. The end result is a smaller file size than most original pic file sizes.
Its a pain in the butt, I know. But at least it may be a solution to posting pics for some.

For others who may also have this trouble and use a windows pc, I show some basic instruction here:

And long term, check the last page or last post in a long standing thread: "Posting pics on South Bend Forums". I'll update that as I learn more. For now I posted the same there:
 
texasgeartrain and m-lud: Thanks for your information. I think I have what I need to get the rest of my pictures posted. (Just glad I got through most of my posts before this change!)
 
These pictures are of the Pratt & Whitney at various stages of reassembly. They should all be fairly self-explanatory.
 

Attachments

  • 1859.jpg
    1859.jpg
    255.6 KB · Views: 35
  • 1866.jpg
    1866.jpg
    190.3 KB · Views: 35
  • 1880.jpg
    1880.jpg
    201.8 KB · Views: 34
  • 1867.jpg
    1867.jpg
    199.2 KB · Views: 38
  • 2039.jpg
    2039.jpg
    267 KB · Views: 41
  • 2042.jpg
    2042.jpg
    154.8 KB · Views: 39


Back
Top