What's new
What's new

Purchasing a Hendey lathe

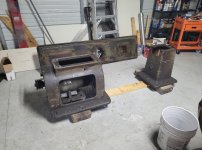
Well the cold weather and holidays shut me down for awhile. But I'm back at it again. I found an old school machine shop with a hot tank, he dipped my entire bed and the two small legs for $80 bucks! It came out like new, and had a light coat of flash rust by the time I got home. I went ahead and slapped a nice coat of self etching primer on everything until I decide when to paint everything.

I'll be taking the leg castings and other body castings for hot dip next week sometime.

I'll post some pictures shortly.
 
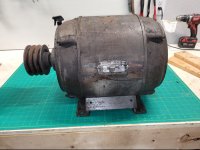
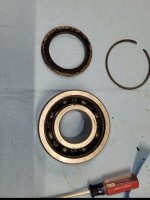
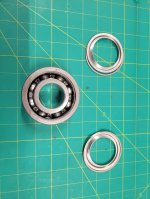
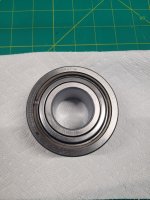
I got a coat of paint on the 2 small legs for the bed. I went ahead and brought the 5hp motor up to garage where it's comfortable to work and I have power and heat (this sucker is heavy, it probably weighs almost as much as me at 155lbs, remember to lift with your legs!). I got it completely disassembled minus bearing removal. The bearings have a touch of play, but the can free spin forever. I'm gonna disassemble, inspect, and then repack with grease. They're NORMA 3607 bearings, around $50 a piece I think. The rear bearing is numbered 3607-J and has a large groove, and a set screw for oiling or greasing I'm assuming, every though you can't access it without removing the rear bell housing.

I'm gonna hit the windings with some CRC lectra motive cleaner and a plastic brush, hopefully 2 cans will be enough. Once everything is cleaned I'll replace the insulation on the peckerhead wiring, apply some glyptal to the windings, and repaint everything.

I'll post some pictures shortly.
 
Last edited:
I've been making steady progress on the motor. The bearings are cleaning up great with an overnight soak in zep purple degreaser. I got one cleaned and repacked with grease. The other is currently soaking along with other small parts.

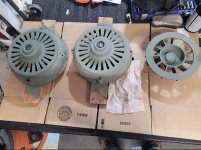
I got the bellhousings cleaned and primed, along with the cooling fan. I'm gonna finish them tomorrow when the weather is better, along with cleaning the windings and main motor housing to prep for paint.

Screenshot_20230114-234701_Gallery.jpgScreenshot_20230114-235004_Gallery.jpgScreenshot_20230114-235017_Gallery.jpgScreenshot_20230114-235025_Gallery.jpgScreenshot_20230114-235034_Gallery.jpg
 
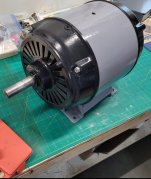
I took the motor housing to my local shop to only get the windings cleaned, and he gave me a good deal on cleaning it, installing new leads, re varnishing it with his industrial varnish, and baking the varnish on. Ran me $120, seemed fair to me. Unfortunately I didn't get a picture of the windings after they were finished, I thought I did, but the motor is already back together.

I have most of the parts painted. Small parts have 1 coat so far and the large parts have 2. I'll be applying 3 coats in total. I'm allowing 2 days for each coat to dry, temps are around 75f in the garage with a small heater running.
 
I was going to upload tons of pictures yesterday, I forgot about the size requirement though and it ended up being a waste of time, and it's a real pain re sizing every photo to post, so I may start a new thread in owwm to upload more photos.


Here's a few pics to show the current progress

Screenshot_20230131-065002_Gallery.jpgScreenshot_20230131-063200_Gallery.jpgScreenshot_20230131-065310_Gallery.jpg
 
Looking good! Something about getting every nook and cranny clean, polished, and painted just feels good. It might not make it more accurate, but it has a big influence on how much enjoy using a machine, as well as zeroing in on what the real problems are. IOW, instead of having a "used lathe," you have a rebuilt lathe minus problems A,B, and C, and once you know those things you can adjust your usage and expectations, if not fix them.

IMO the mark of a good machinist isn't how high of tolerance you can hit, it's how consistent you are. If you can hit a .00001" diameter after scraping 50 parts, that's not as impressive as making 50 parts all +/- .001". Having machines you personally understand and trust is a big part of that.
 
Last edited:
Looking good! Something about getting every nook and cranny clean, polished, and painted just feels good. It might not make it more accurate, but it has a big influence on how much enjoy using a machine.

You hit the nail on the head! Having a clean machine is a pleasure to work with, and clean up is much easier.

Getting all the parts hot dipped was a great idea as well, it really brings out any stress cracks or other damage to the cast that would be missed otherwise, I found a few minor cracks in some cast body pieces, but nothing that will affect the machine in any way.


Anyone have advice on what to use between metal to metal contact points when re assembling? (Bed to legs, etc) I'm thinking of using some nickle anti seize to keep parts from rusting and to aid in disassembly in the future if needed.
Stuff like ant-seize wouldn't hurt, but I think just general purpose oil would be best. For sure don't assemble dry or you'll likely have some galling issues between parts, but given that it isn't under crazy temperature, pressure, or torq specs, IMO oil is fine. At most I'd use something like Lubriplate 105 as a general assembly lube.

Concerning parts sticking or sliding, check the condition of the bed, saddle, cross-slide ways etc. Even if you want to run it as is, if these pieces are smooth metal on smooth metal, they'll be prone to "stick-slip" where the motion is slightly jerky because the smooth weighted surfaces squeeze out the oil and the metal grips then releases as you move. If you get a simple hand scraper, you can break up the surface with some evenly spaced shallow scrapes that will help keep the oil in place. As long as you don't go wild with it and try to keep the existing surfaces intact, you won't need to worry about if you are making the surface better or worse alignment-wise.
 
Progress is slow, but still coming along. I've been posting photos and updates on OWWM, its a pain to post photos on this forum from my phone, trying to re size everything, etc. I'll post a link to my OWWM thread (I hope posting this link this is allowed)


I'll still post here when I have questions and whatnot, I just wanted to update this thread for those who are curious.


Back
Top