What's new
What's new

Saved a Hendey from the scrappers yesterday

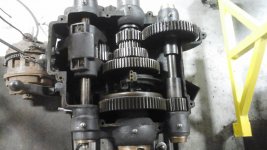
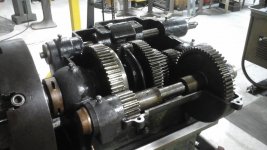
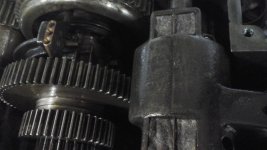
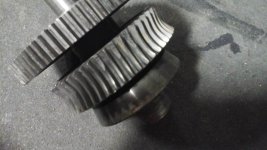
Cracked open the headstock last night. Mainly wanted to clean an inspect it for problems. There are a few teeth that have mushroomed about from chips and stuff being forced through them (easy fixes with a file), but otherwise no critical damage, just filthy. The brass yoke that shifts the engagement clutch between the high and low ranges feels like it has a lot of wear and was missing the upper screw. When the day comes to pull and service the spindle, I'll see if I can add a bronze sleeve to it to take out the play. Right now though, it's still shifting without issue. When I ran the lathe before I started taking it apart, things did sound a little clunky in general but I think it was mostly accumulated play in the gears and linear movement in the shafts, but nothing looks too far out and I couldn't feel any wear in the shafts and bearings themselves. The worst is some wear between the bearing and retaining collar on the right side of the pulley shaft (shaft closest to the operator), and this can be fixed externally.
20160825_192359.jpg
20160825_192410.jpg
20160825_192436.jpg
 
One other thing I did was remove the chuck parking attachment. The top side was supported off of the thin upper headstock casting and it had been broken and sloppily welded and brazed a few times. I desided to just remove it entirely and grind down the welds. If the cracks come through again I'll V them and braze them properly so that with some paint, you'll never know it happened. The chuck isn't that heavy (to me) so might as well show off more of the iron.
 
Well its not as clean as i'd like, but its much better. Continued oiling with proper lube and flushing it often should keep it going. I closed the headstock back up. I put new felts in the tumbler and the brass back gear shifter oiler (as well as replaced the missing screw). It has about 1/8" of play in it up and down, but has a nice fit side to side. Mabey its suposed to be that way.
20160831_193109.jpg
20160831_193133.jpg
The brass yoke i'm talking about is in the upper left corner.
20160831_195719.jpg
The ground-down brazing. The headstock is 90% free of that old green paint. The remaining bit is around the bottom by the ways. Removing the paint revealed some other cracks stemming from those that had been fixed, but I think without the weight of a chuck hanging off of it, they shouldn't get any worse. None of them seem to interfere with the motors support.
 
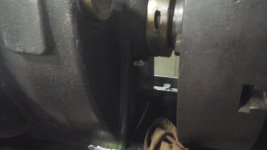
Got a question for you guys. There are a couple NPT threaded holes that seem to intersect with the spindle bearing resevours. The toppers poped out when I blew air into them. I'm guessing they are to help flushing out the bearings as they are too low to be for oil level (?) But they seem redundant as there are already drain ports on the back side of the headstock. The one behind the chuck has an oiler threaded into it and the one on the left side had a bit of copper tubing attached to it with a brass fitting. Neither of which seem original as everything else has bair holes or brass tubing pressed in. Could these have been added by someone later who didnt understand how to pull the oil toppers:rolleyes5:, and would it be safe for me to just plug and ignore them?
20160831_195748.jpg
20160831_195733.jpg
 
When I get the planer working that saddle might be a good candidate for a work over :) Should be working well by the scraping class to be held here in february.

That would be great! I'm still very much an amature when it comes to scraping and "proper" machine tool rebuilding. I'll be a ways off from being able to do anything with the ways but could the under side of the saddle be reworked in the meantime, or is it best to do them together?
At least, I could rework the cross slide and clean up the anvil.... I mean, top side of the saddle :nutter:.

I've done a little clean up on the ways (pics to come) and it looks like there's more abuse than actual wear. I consider that the lesser of the two evils as I can stone and file the burs and mushrooming down easier than I can bring it back up to level. Hopefully that can buy me some time at least.

In the big picture, I'm trying to keep a game plan for keeping, or rather restoring, the centerline relation between the headstock, tailstock, saddle, and ways. I'm wondering if the material taken off the cross slide and the material scraped off the ways, would be enough to use inserts under the saddle to counteract the drop in the carriage? If so could I get all the machine work done on the saddle and bolt in a set of inserts that bring it back to stock height, then when the ways are fixed, bolt in a thicker set of inserts and scrap them in together?

The accepted practice is to plane or mill one surface and build the height back by applying mongolice or trucite to the other surface..
Turcite(R) : Aetna Plastics

You are really close and if you are interested in rebuilding it would be a good idea to attend Texas 3, at my shop, this February. All this is covered in the class along with a ton more...
 
Got a question for you guys. There are a couple NPT threaded holes that seem to intersect with the spindle bearing resevours. The toppers poped out when I blew air into them. I'm guessing they are to help flushing out the bearings as they are too low to be for oil level (?) But they seem redundant as there are already drain ports on the back side of the headstock. The one behind the chuck has an oiler threaded into it and the one on the left side had a bit of copper tubing attached to it with a brass fitting. Neither of which seem original as everything else has bair holes or brass tubing pressed in. Could these have been added by someone later who didnt understand how to pull the oil toppers:rolleyes5:, and would it be safe for me to just plug and ignore them?
View attachment 179483
View attachment 179484

Johnoder, you answered my question years ago!
http://www.practicalmachinist.com/v...endey-lathe-155666/?highlight=Babbit+half+nut
Found this thread while looking for info on the half nuts. Mine are babbit as far as I can tell and though one side still engages, the other is not stripped, but an empty box. So re-babbiting will be on the radar.

But anyway, from what I understood in Johnoders post in that thread, the threaded holes under the spindle bearings are for actual oil filling, whereas the toppers above the spindle are only for inspection. NOW it all makes sence:scratchchin:.
 
But anyway, from what I understood in Johnoders post in that thread, the threaded holes under the spindle bearings are for actual oil filling, whereas the toppers above the spindle are only for inspection. NOW it all makes sence

Hopefully at least to some Hendey owners. You can be sure that many keep pouring oil into the inspection ports, totally unaware of how this marvelous design works
 
Hopefully at least to some Hendey owners. You can be sure that many keep pouring oil into the inspection ports, totally unaware of how this marvelous design works

John,
I'm one of those offenders, since the inspection ports (especially the one on the spindle nose side) are way more accessible than the oiling ports: if I were to add too much oil, the intended oiling ports would act as "overflow valves".

Paolo
 
It would seem to me that the point of the filling ports is to keep you from having excess oil bleed out of the bearings. As long as you keep it up to level with the apropreiate oil, your process for doing so would be open for interpretation (?).
When I first looked at these bearings, the holes seemed way too low for that level to transfer oil to the spindle, but I had forgotten about the rings inside dipping into the oil. So really its intended that the oil level be below the spindle bearings. The other bearings, not so much, as that oil should be thicker and therefore less likely to squeeze out of the bearings.
 
20160908_203605.jpg
The apron is off and almost void of green paint and oily sludge (getting close)
20160908_203624.jpg
The half-nuts are pretty sorry. One side is better than halfway gone, the other is missing its insert. These are infact the brass style and not babbit as I had thought.
20160908_203658.jpg
Someone did a nice patch job on this gear
20160908_203707.jpg
One of the worm gears has 3 missing teeth.
 
20160908_210115.jpg
One hole in the apron had a steel bushing pressed in. Unfortinatly this produced a couple of hairline cracks. Luckely the shaft still has a nice fit, however the bushing slipped making the oil hole off. I'll see if i can tap it over and pin it or something.
20160908_203831.jpg
The aprons bearing support closest to the headstock has had its holes slightly elongated: evidence of wear between the ways and saddle:ack2:. Easy to reverse once they are made true again.
20160908_203758.jpg
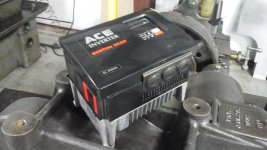
The lead screw bearings have lots of slop. I'll have a better idea what that entails once they're slid off.
 
It would seem to me that the point of the filling ports is to keep you from having excess oil bleed out of the bearings...
You will find the answer by yourself when you will start running this lathe.
Anyhow, the headstock is completely open on the bottom and all the gear lubrication soon or later ends up on the floor under the headstock. A few drops of oil overflowing from the official filling ports of the spindle bearings are rather insignificant in this context.

Paolo
 
1473902340534-675866068.jpg
1473902381030274404990.jpg
Got the saddle flipped over. Its not as bad as I thought as the oil grooves havn't been wore clear through. Not sure what to reference for a measurment.
14739025160991227544653.jpg
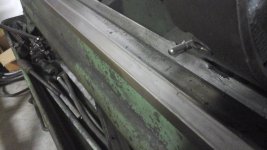
Virgin portion of ways behind the headstock.
1473902583076700022429.jpg
One of the deeper wear streeks on the back v, just past the chuck. About .0200 deep at the worst.
1473902884940-1173849233.jpg
Looks like some shadows of the original scrapping are still present towards the tailstock.
 
Its a 16 by 8, but I'm trying to remember if thats 8ft. of usable bed, or if that includes the bit under the headstock. I'll measure it tomarrow.


Means overall length of bed casting - before they decided the customer would be more interested in a between centers dimension as part of the description

Later, Hendey would advertise and mark them such as 16 X 54


Back
Top