What's new
What's new

Stark Lathe/Mill Ser. 351

MrStretch

Hot Rolled
Joined
Mar 20, 2017
Oh no, it's a combo machine thread!
See here for the seller's pics https://www.practicalmachinist.com/forum/threads/stark-lathe.403655/
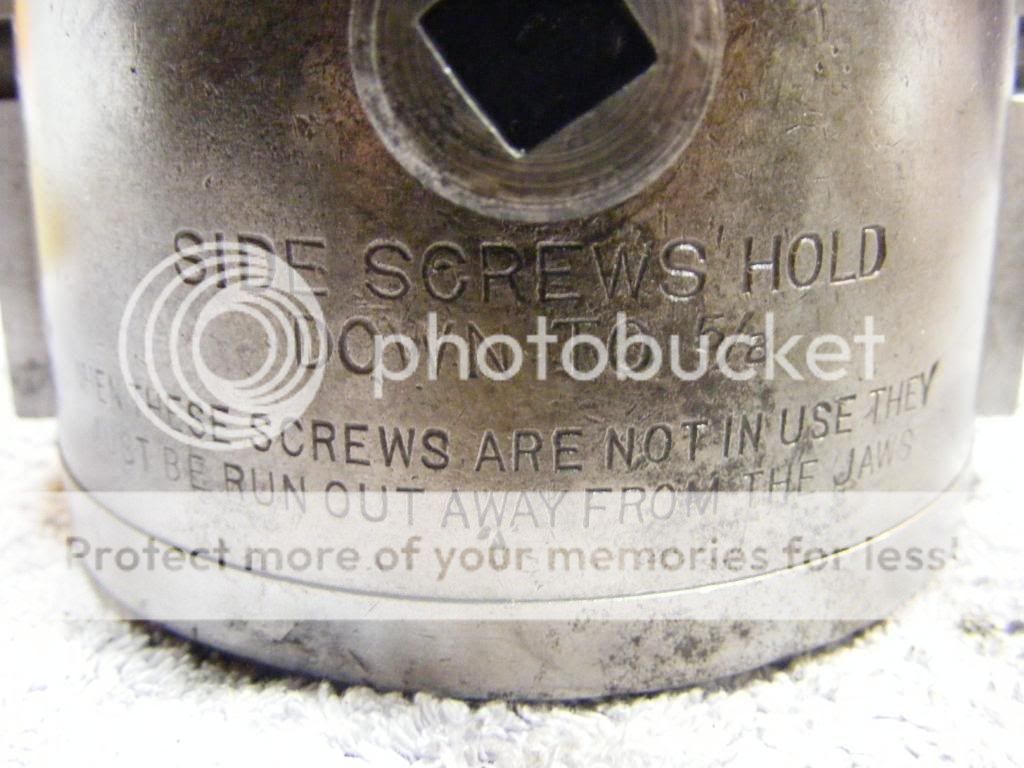
This thread is about cleaning & repainting the lathe, an early Stark #4 with milling attachment, serial # 351.

The lathe appears to be in excellent mechanical condition and only shows some minor signs of abuse.
topslide.jpg

The finish is definitely original as most of it is missing. What looked like old repainting in the seller's pics turns out to be the various colors of the patina of the exposed cast iron and the remaining bits of the japanning. Also, It's not nearly as rusty as I expected. The only rust that I need to treat is on the crossslide handles, dials and the tailstock handles. The rest is either oil staining/patina or very light rust that will come off with oil & 0000 steel wool.

headstock.jpg

The bench and countershaft are absolute beasts! What looked like a normal shop-built angle iron bench was apparently made when giants walked the earth as it's made out of 2" x .25" angle iron. The countershaft weighs at least 80lbs and supplies the flat belt tension by leaning back slightly, pivoted on a pin at the bottom. It has fwd, neutral & reverse using the long lever at the top.

countershaft.jpg

Does anybody recognize this? The motor is mounted to a pivoted plate directly underneath the countershaft in a way that suggest the two were made together.

The lathe is missing the entire threading attachment except a handful of forms & followers, which I knew before I bought it. This is generally not a problem as I've never needed to cut threads with a lathe, but the missing change wheels are also used with the dividing head.
If anybody knows the whereabouts of a set of orphaned Stark change wheels or maybe something I could adapt, please let me know.
 
Over the last few days, I've had the opportunity to disassemble & clean the slide rest. Here's what the handles looked like before evaporust.
rust.jpg

The top & bottom slide parts after cleaning with mineral spirits and #0000 steel wool
bottom.jpg
botscrew.jpg

top.jpg

and finally, a couple of glamour shots in the morning light

slide1.jpg
slide2.jpg

It's a bit stained and dented and the handles have a bit of a mat finish after rust removal, but it's in unbelievably good shape mechanically. Both slides are smooth and don't tighten/bind all the way to the stops and there is only the slightest bit of lash. Remarkable. It was obviously operated a gorilla at some time in the distant past but not for a long enough time to significantly damage it.
 
The lathe came with this interesting 2 jaw drill chuck.
ts.jpg

tsparts.jpg

Does anybody know what this type of chuck is called? Is the word "dog" involved?
According to internet, the history of drill chucks started with Jacobs at the beginning of the 20th century and searches for 2 jaw drill chuck turns up almost nothing relevant. Like the rest of the lathe, there is very little wear. This one is unmarked except for the stamps on one end of the screw.

Thanks!
 

Attachments

  • tslabel.jpg
    tslabel.jpg
    212.5 KB · Views: 2
Some one else may come along with a better answer but there were some posts in the past about Wescott drill chucks that were similar as seen here ,
Found in Post # 12 of this thread ,
Also here ,
Found in this search ,
I think there were several others who made the same style of chuck so someone else may know about them .
Jim
 
Great, thanks. It's interesting that the history of something as useful as a drill chuck has apparently been mostly lost. Another thing about this lathe that is probably unknowable. Maybe the "S1" means it was made by Stark? I really like the bit of decorative turning at the base.
 
Thanks again, Jim
Apparently, this kind of chuck is called a "Westcott-style" drill chuck here in the 21st century. They are still used on some woodworking machines, presumably because they work well with square shank tools? I wondered about square shanked vs. Round drills as 19th century clockmakers would have been accustomed to making their own spade drills with square tool steel.
 
Here's a few posts dedicated to the milling attachment.
First, as received, sitting on it's back on the bench.
rec1.jpg
the original Japanning on the knee looks OK and was not redone.
and another sitting on the base.

rec2.jpg

Mostly just patina/oil staining with a small amount of rust on the dials, probably old acidic hand sweat.

rec3.jpg

Disassembly was straightforward, starting with the z slide base. Everything was cleaned with mineral spirits and brushes/#0000 steel wool and the handwheels spent a little time in the ol evaporust. The only thing I had trouble taking apart was the Y slide nut would not budge using a large punch and mallet, so I left it alone and cleaned up the knee as well as I could.
knee1.jpg
knee2.jpg
 
Next, the Y screw was reassembled
yslide1.jpg

yslide2.jpg

This screw and the Z ( elevation ) one are designed just like the cross slide screws with a keyed end bushing secured by a large-headed screw. In the is case, the end bushing is recessed fully into its seat.

yslide3.jpg

the Z axis was next. Top of the base/mount
zslide1.jpg

The bottom:
zscale2.jpg

Interestingly, there a 4 unused blind taped holes and 2 dowel pin holes. Only the 4 larger holes at the mid/top are used to mount the mill to the lathe/ It's also interesting that the base of the mill appears to not have scraped in to align with the end of the bed.
 
Z axis con't. Here are the cleaned parts.
zslide3.jpg
zslide4.jpg
zslide5.jpg

The 2 bevel gears are stamped "C.G.W.". Something Gear Works, I suppose. These is only obviously "brought in" parts I've found.

zslide6.jpg
 
Assembling the z slide was a easy as it looks- the only difficulty is reinstalling the nut after putting the slide back on.
zslide7.jpg
zslide8.jpg

zslide9.jpg
Oy! just a few casting voids. I wonder if they were still trying to figure out how to cast steel when this was made. Reminds me of some of the 18th century tallcase clock movements I've restored - if the void's not directly in the way leave it be!

Finally, the x / table was installed.
xslide1.jpg
xslide2.jpg
 
xslide3.jpg
xslide4.jpg
xslide5.jpg

The table screw is different from the others with the front bearing in the screwed-in plate on the end of the table and the nut secured by the same kind of large-headed screw used to secure the end bearing on the other slides. There is no end bearing.
xslide6.jpg
xslide8.jpg
 
Here's a closeup of one of dials/handwheels. The scales are not reset-able.
scale.jpg
The screws are 10 tpi and there are 100 divisions so given the size of the handwheels, there's an easy .00025" resolution ( hee,hee,hee. like the extra digits on a calculator ).
I don't have any dial indicators or such but it would be interesting to measure all the slides and screws someday as it's in almost unused condition.
 
I'm Surprised to see the (lack of) quality in the castings used for these pieces, not typical of Stark made tooling, quality control inspector must have been off the week this was manufactured:)
 
Part of its charm.
Actually, I wouldn't say the castings are low quality. I highlighted the worst in my pictures and most of the voids are in places that are not visible with the exception of the bottom stanchion pictured above which is on the very back bottom corner, so not really visible. I would guess that they were doing the best with what they had and were being smart about accepting parts that weren't perfect but were perfectly usable, just like the way clockmakers used to work.
A good example is the headstock, tailstock and indexing head castings were all ground/filed fairly smooth before painting while the unmachined portions of the bed were not, similar to the way only the back (most visible) of the back plate in a tallcase clock is finished/polished.
 
The lead screws here are square thread form. Unusual, and difficult to cut. They pre-date adoption of acme lead screws. Totally cool.
 
Interesting, thanks Jim. I didn't know that acme threads were a relatively recent development. Now I need to go to my shop and look at the leadscrew threads in the crossslide of my other #4 from the 1920-30s. If it also has square threads, it means that Stark decided square is better or more likely they stuck with what they already knew how to do.
What would have been required to make a precision square screw in 1870/80? I'm imagining special-built grinders that used a master thread of some kind? I'm obviously not a real machinist but it does seem like it would be difficult to cut without tool clearance issues. Who knows? It's fun to speculate - we definitively know John Stark was a really smart guy and probably had alot to do personally with designing the machines to make the machines....
 
My seneca falls machine has those, and also early hardinge toolmaker's compounds were square thread form. They can be cut but the shape of the tool has to be right, with all the side clearances and the correct helix angle. I was also really impressed with the stark machine's dial numberings on the exterior rim of the handwheels.
 
The later #4 (serial #2395, 1920s?) Has the same square threads in the crosslide. It wouldn't surprise me if the two slides, separated by maybe 40 years, are identical.
 
gears.jpg

The gear on the left was on the indexing head and on the right is the driving gear for the threading attachment that slides over the end of the main spindle. Am I wrong to think that the indexing head gear was never intended to mesh with/drive another gear?
The main spindle's OD is about 0.05mm smaller than the indexing head spindle so that the threading attachment gear doesn't fit the indexing head. All of this leads me to think that the lathe must have been originally equipped with 2 different sets of gears, one set of change wheels for the threading and another shallower set for the indexing?


Back
Top