What's new
What's new

CNC Thread deburring

Cody_PM

Plastic
Joined
Feb 20, 2024
Location
Louisiana
Good Morning All,

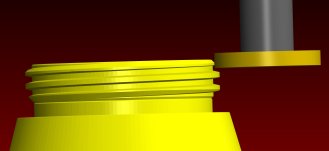
We are currently looking at increasing the production volume of one of our products that includes an external 1/2-28 thread at the end of the part. In the past we have hand finished these threads in the lathe using a file to deburr the start and end of the thread, and cratex to polish/clean the threads. we will now be machining these parts in our new multitask machine, and would like to eliminate the hand deburring step from the manufacturing process.

I am looking for some guidance in simulating the finishing of using files/cratex to deburr the part, without using a higbee thread at the start and end.

Thanks for any help guys!
 
Why is it not an option? Doesn't seem like anything there would rule out tumbling. You can fairly easily plug the ends so there's no damage to rifling or crown.
 
NYC CNC does a good video on Youtube about Higbee start threads on the lathe specifically for fusion but the principle would likely be the same for other CAM packages.

The basic idea is you offset your Z starting position by the PDX value on your threading insert (check your threading insert brochure for this value) so that the tip of the grooving tool just kisses the root radius of your thread. Set the end Z position to 1 full rev of your part and ramp out of the thread (if you pull straight up you'll just move the burr along - fade thread end it's called in Fusion). The tool should take the top off of the thread but you may need to adjust your finish Z position slightly to get it perfect - it depends on your lead in chamfer as to where the first full thread begins. Depending on the size of the thread I usually give it between 3 and 5 passes. Could probably just go with one or two in smaller threads but I'm rarely running production.

The finished result does sometimes look a little odd because this operation essentially wipes out most of the lead in chamfer so where I can I increase the size of this. I do however get burr free threads right off the machine and I don't usually even have to bother with a spring pass after to deburr. If you have a thread relief at the back end of the thread then you'll probably have to re-undercut and spring pass. Personally I've found this still leaves a sharp thread though without tumbling.

1708437190185.png
 
Chamfer and turn, undercut, thread, rechamfer, re-undercut.

Make sure the last pass is rethread so any tiny burrs remaining won't be in the thread space. Sometimes it will take two deburring cycles to really get at the burr. The more ductile the material the less effective this method becomes. The trailing thread can be demurred in the same direction as the thread, but it helps if you come at the leading thread from the opposite direction.

Using the above method will usually produce functional parts. But for cosmetic stuff like gun parts do as above and then use cratex. A lot better and quicker than filing followed by cratex, and more repeatable results. And it's beautiful.

Brushes in the machine I've found to be problematic. Brass is one thing but I've tried brushes in the spindle with steel and they work a bit but if you really look you'll still find a burr. Even the xebec type. Also with abrasive filled brushes the abrasive winds up in the coolant. Not cool! Orientation of the brush axis makes a big difference. Parallel to the thread axis with a standard wire mounted brush is virtually ineffective. Perpendicular helps to knock off loose hangers, but any burr of consequence is just kinda polished and rounded.
 
We follow these steps:

  • Chamfer, turn (or bore) the thread o.d. (or i.d.) and the thread relief.
  • Thread the part.
  • Repeat step 1.
  • Repeat step 2.
For us, this has eliminated any further deburring of the thread.
 
In my experience the process Daryl describes will likely achieve a burr free or nearly burr free thread depending on the material, but of course the thread will be sharp at the terminations.

A rotary brush tool in the machine should remove any fine burrs that remain and reduce the thread sharpness. Doing this should help your Cratex tools last longer or maybe even eliminate the need for them.

A method I have used to remove sharp threads on threadmilled parts is to truncate the thread into the terminations with a thin T-cutter. I only cut a small flat such that its width matches the width of the crest of the thread. The width of this flat stays consistent as it follows the thread into the terminations. One way to draw the curve necessary to make this kind of toolpath is to save the toolpath simulation model as a solid, then import it back in, then make points along the intersection of the chamfer and the thread, then create a spline from these points and use that to create a contour toolpath. Adjust as needed to make the simulated results look just right. It takes a while to get it programmed just right and then dialed in on some first articles but it's worth doing on a production part. This method removes the sharp parts of the thread but without removing any functional thread length, and it doesn't look weird like a higbee.

Here's an example of that on a 16 tpi acme thread.
 

Attachments

  • thread_flat.jpg
    thread_flat.jpg
    94.7 KB · Views: 11
Last edited:


Back
Top