guythatbrews
Titanium
- Joined
- Dec 14, 2017
- Location
- MO, USA
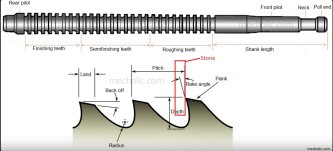
When you stone the braoch tool, are you doing one tooth at a time, like this?
IMO this is not the surface you should stone. You are removing clearance from the tool. This does help with the broach hogging in and tilting, but tools need clearance to cut well. You need to stone the cutting face to reduce the "rake angle" in your drawing. Excessive rake for the material is what makes the broach self feed away from the bushing and dig in.
So each tooth must be stoned individually.
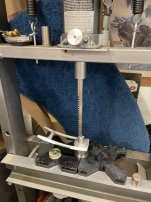
Don't just jump right in and stone it before you try it! The majority of the time the broach will work right out of the box. Push it until a few teeth enter the work. Release it and look very closely at the exit side. The back of the broach should be in close contact with the bushing. If it's coming away you should stone it. Push a few more terth and repeat. If you make it all the way through on the first pass, it's very unlikely it will hog in on the subsequent pass. Just go for it.
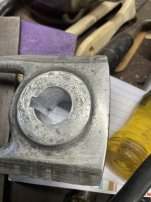
This all has gotten blown out of proportion. There is no need at all to do any roughing! The broach will EASILY keyway pretty tough steel, and your part is just aluminum. Be sure the bushing is as long as the part so the broach is fully supported. Then just broach the thing.