What's new
What's new

Graziano SAG 12 Restoration

jeffrey jekran

Plastic
Joined
Feb 20, 2023
Hi all,
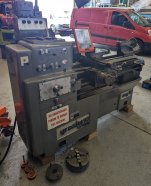
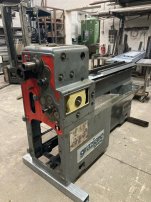
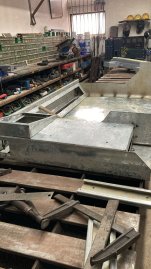
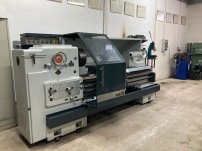
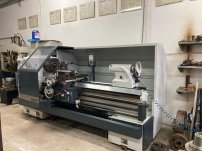
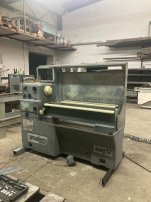
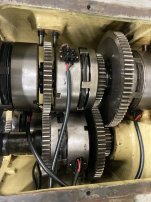
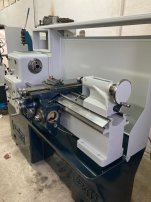
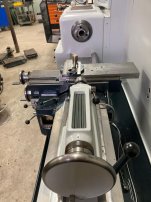
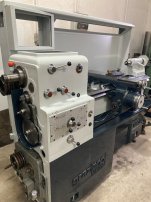
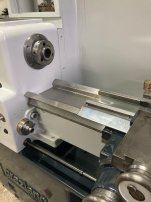
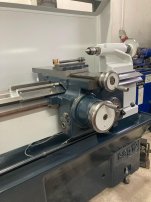
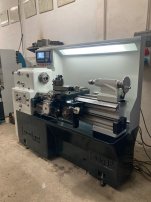
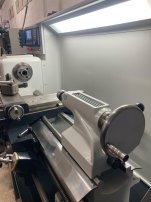
I Just started a fully restoration on the Graziano sag12
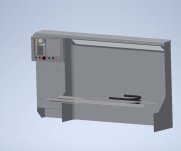
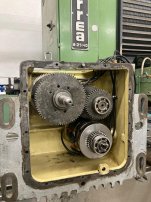
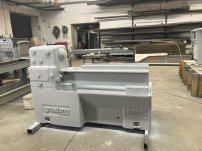
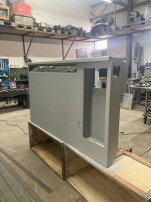
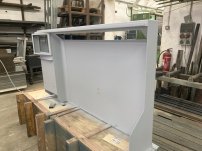
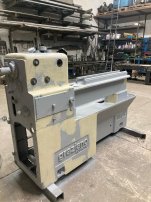
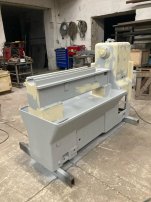
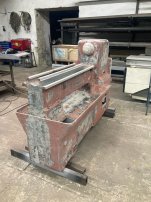
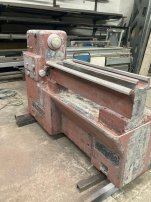
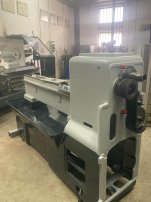
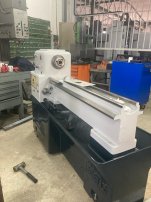
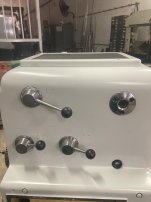
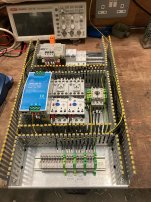
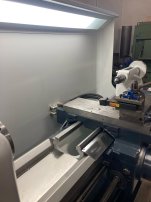
This was the first lathe that i been learning from school so it will be a bit nostalgic for me and about a year ago i been very lucky to find one from an university that has been very little use as of now we strip the machine and when we inspect all of it i can say that it is almost perfect no wear at all the only things that have been wear out are rubber parts and wires that feed the gearbox in the meantime i designed a new splash back to have also the safety door included and DRO
 

Attachments

  • 1.jpg
    1.jpg
    408.8 KB · Views: 58
  • 2.jpg
    2.jpg
    125.5 KB · Views: 59
Looking at your photos and trying to understaand that shield along the front way.
I now see that there is a third
Way under there that I suppose helps support the weight of the apron and the extra pressure cutting tools put on the front of the carriage.

I always thought better supporting of some of the extra weight of the apron and tool pressure put on the front Way would help from wearing the backside of the front Way.
Adjusting that would be critical balance.
It may even help reduce wear on the feed rod and leadscrew and their apron drive parts.

Often apron Carriage and Way wear is accelerated by the Carriage hold down adjustments being loose.
Lack of keeping things adjusted.

Jeffery
Thats a nice looking and well-built lathe. I like lathes witth the gearbox driven down on the motor and the spindle being belt driven.
I'm enjoying watching your restoration.
Your gears condition looks great.
Mike
 
Last edited:
Looking at your photos and trying to understaand that shield along the front way.
I now see that there is a third
Way under there that I suppose helps support the weight of the apron and the extra pressure cutting tools put on the front of the carriage.

I always thought supporting some of the extra weight of the apron and tool pressure put on the front Way would help from wearing the backside of the front Way.
Adjusting that would be critical balance.
It may even help reduce wear on the feed rod and leadscrew and their apron drive parts.

Often apron Carriage and Way is accelerated by the Carriage hold down adjustments being loose.
Lack of keeping things adjusted.

Jeffery
Thats a nice looking and well-built lathe. I like lathes witth the gearbox driven down on the motor and the spindle being belt driven.
I'm enjoying watching your restoration.
Your gears condition looks great.
Mike
thanks
 
Looking at your photos and trying to understand that shield along the front way.
I now see that there is a third
Way under there that I suppose helps support the weight of the apron and the extra pressure cutting tools put on the front of the carriage.
Mike,
Here are some photos showing the covered ways. Note also how the raised tailstock ways stop short near the spindle, creating a built-in "gap".
There are several other lathes which use a similar design of raised tailstock ways, covered main ways.

Graziano Sag 12 bed 01.jpg Graziano SAG 12 way covers.jpg Graziano SAG 12 carriage 01.jpg SAG 12 swing etc dimensions.jpg
 
Last edited:
Thanks Peter
I see now tthat the lower ways are the Carriage Ways. The Ways also look nice and wide.
The covers are a nice feature. There still appears to be enough room in between to wipe the ways off although almost all thhe chips will be deflected.

Stopping the tailstock Ways where they aren't needed and lowering the Carriage Ways gives a lot more swing room for the chuck jaws. Nice

Mike
 
These were very expencive lathes at the time
More expensive as a Weiler for example
BTW Do you make the electrical all new ??
Did you figure out the wire diagram that comes with the machine?
I am under the impression the voltage on the clutches drops after innitianal engaging (Not sure as I still cannot find out that wire diagram)
It does not have the break option it seems
I think that can be done with the excisting clutches Not sure though

Peter
 
Hi Guys
Bad news when we apply the primer did not match the Graziano some how so we had to remove all the original paint and start from scratch
 

Attachments

  • 17.jpg
    17.jpg
    120.5 KB · Views: 17
  • 16.jpg
    16.jpg
    103.2 KB · Views: 17
  • 15.jpg
    15.jpg
    136.3 KB · Views: 18
  • 14.jpg
    14.jpg
    135.7 KB · Views: 17


Back
Top