ballen
Diamond
- Joined
- Sep 25, 2011
- Location
- Garbsen, Germany
Ah, OK, one of those words that does not make sense in English. Like "flammable" (which means it burns) and "inflammable" (which ALSO means it burns).
Follow along with the video below to see how to install our site as a web app on your home screen.
Note: This feature may not be available in some browsers.

Rich:
Long reaches with and swarf cutting on long reaches rarely gives nice parallel bores, and high surface finish...Plus getting a true round hole becomes a problem...
TNB: cool idea on the block threading-nice Schaublin! What made you decide not to do that on your FP1?
TNB is not Ross.I don't think Ross has an FP1 anymore...I think he only has FP2 and larger. Go big or go home! LOL
TNB is not Ross.
")
 )
)I was thinking a Wohlhaupter UPA2 would be a good size for the FP1, although I know Deckel sold the UPA3 with the machines, that seems similar to the Gamet I have which is slightly big. Another factor on the Gamet is that it's slightly difficult to count the clicks, as they suggest running it at 100 rpm, and the FP1 only goes down to 190 rpm in it's slowest gear.
LOL... well, your French is way better anywayI wish I was Ross, but alas...
I'm only me
I wish I was Ross, but alas...
I'm only me
")
I still have the FP1 but again, that's the threading part of the job that had me do it on the lathe. I don't know how I would have done with a larger head...
The UPA3 is really a perfect mate for the FP1 in my opinion. Probably depends on the typical job you do but for all around work, the UPA3 is the right size.
If you intend to do a lot of small work and can afford it, may be the ideal would be to have an UPA3 and something really smaller like the UPA1. It's a bit weird that you mention the slowest spindle speed beeing 190 rpm, since my machine starts at 40rpm.
Providing your machine still has its original dual speed motor, the lowest spindle speed should be 95rpm for the vertical head and 60rpm for the horizontal spindle.
I wish I was Ross, but alas...
I'm only me
I still have the FP1 but again, that's the threading part of the job that had me do it on the lathe.
I don't know how I would have done with a larger head...
I don't think I'll ever have an NC machine. My NC car gives me trouble enough...
So may be someday I'll have to figure out a way to add some threading capability to the Deckel. Shouldn't be that much of a problem with the quill, but it's only YET another thing to do !
The UPA3 is really a perfect mate for the FP1 in my opinion. Probably depends on the typical job you do but for all around work, the UPA3 is the right size.
If you intend to do a lot of small work and can afford it, may be the ideal would be to have an UPA3 and something really smaller like the UPA1.
It's a bit weird that you mention the slowest spindle speed beeing 190 rpm, since my machine starts at 40rpm.
Ross
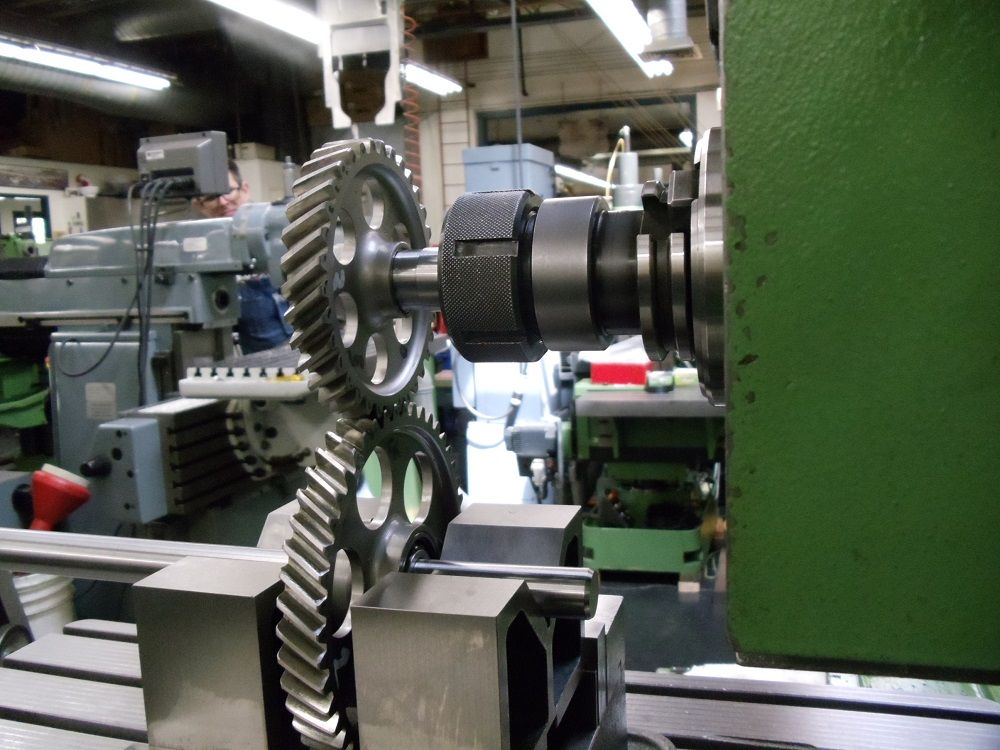
Looking at your gorgeous photos again, I noticed sharpie marks on the upper gear on this one :
What are those marks for ?
Wasn't clear to me how Ross threaded that bore, but I suspect he used the NC to do the threading for him, using a typical threading tool in the head.
Cheers,
Alan
Often one would use an end mill to produce a
cylindrical bore...In this case i am using a thread tool like you would use to thread an internal bore on the lathe (single point) And use that tool to cut in a series of circular grooves coupled with depth moves (Helix) the result is a thread.....The nice thing about this is that i can make any pitch i wish coupled with any diameter....Because nothing is fixed its just a matter of running the math and writing a bit of code.
In the part for this job i selected 20 TPI as my base pitch and the depth was .7" so If you run the numbers...
Technique and do either ID or OD threads...Left or right hand and i can start at the bottom and work out if i like....
Thread milling the way Ross describes has some really great advantages over tapping and single-pointing in a manual lathe. Surface finish is typically fantastic when climb milling. The lead-ins/outs are smooth and highly repeatable. Threads can be run right to the bottom of a blind hole. Male threads can be cut on parts that won't swing in a lathe. The thread mill can easily cut the chamfer at the thread start in the same setup. The only minor drawback is any out-of-round or bumps at the axis reversal points. Once the pitch diameter is dialed in, the threads come out to size repeatedly all day long with one hand tied behind the back.
Notice
This website or its third-party tools process personal data (e.g. browsing data or IP addresses) and use cookies or other identifiers, which are necessary for its functioning and required to achieve the purposes illustrated in the cookie policy. To learn more, please refer to the cookie policy. In case of sale of your personal information, you may opt out by sending us an email via our Contact Us page. To find out more about the categories of personal information collected and the purposes for which such information will be used, please refer to our privacy policy. You accept the use of cookies or other identifiers by closing or dismissing this notice, by scrolling this page, by clicking a link or button or by continuing to browse otherwise.